一. 练习
1
2
3
4
5
6
7
8
9
10
11
12
13
14
15
16
17
18
19
20
21
22
23
24
25
26
27
28
29
30
31
32
33
34
35
36
37
38
39
40
41
42
43
44
45
46
47
48
49
50
51
52
53
54
55
56
57
58
59
60
61
62
63
64
65
66
67
68
69
70
71
72
73
74
75
76
77
78
79
80
81
82
83
84
85
86
87
88
89
90
91
92
93
94
95
96
97
98
99
100
101
102
103
104
105
106
107
108
109
110
111
112
113
114
115
116
117
118
119
120
| 示例1
---------------------------------------------------------------------------------------------------------------------------------
menu(){
echo "1、监控内存使用情况,如果内存使用率大于百分之80,给予提醒"
echo "2、扫描局域网ip,检查哪些ip地址正在使用"
echo "3、监控文件/etc/passwd是否被修改,每隔5分钟监控一次"
echo "4、监控nginx进程是否存在,不存在就给予相应提醒"
}
option_1(){
total=`free -m|grep -i mem|tr -s " "|cut -d " " -f2`
used=`free -m|grep -i mem|tr -s " "|cut -d " " -f3`
used_rate=`echo "scale=4;$used/$total" |bc`
result=` echo "$used_rate>0.8"|bc `
if (( $result == 1 ))
then
echo -e "\e[31m使用率超过80%,请及时对内存扩容,以免不必要的损失\e[0m"
else
echo " nothing to do"
fi
}
option_2(){
for ip in `seq 255`
do
( ip_full=192.168.0.$ip
ping -c 1 $ip_full &>/dev/null && echo $ip_full >>up.txt || echo $ip_full >>down.txt
) &
done
wait
}
option_3(){
check_num=`diff /etc/passwd /lianxi/passwd |wc -l`
[[ check_num -eq 0 ]] && echo "文件未被修改" || echo "文件已被修改"
}
option_4(){
pidof nginx && echo "nginx is running" || echo "nginx is down"
}
menu
read -p "请输入你的选择:" option
case $option in
1)
option_1
;;
2)
option_2
;;
3)
option_3
;;
4)
option_4
;;
*)
echo "请输入1-4"
esac
示例2:重复选择
--------------------------------------------------------------------------------------------
重复选择
while :
do
done
echo "#########################"
echo "1.查看内存使用率"
echo "2.扫描局域网ip"
echo "3.查看文件是否被修改"
echo "4.查看nginx进程"
echo "5.退出"
echo "#########################"
while :
do
read -p "请输入你的选择:" options
case $options in
1)
/root/shell/mem.sh
;;
2)
/root/shell/scan_ip.sh
;;
3)
/root/shell/passwd_test.sh
;;
4)
/root/shell/ngnix_test.sh
;;
5)
echo "退出"
exit
;;
*)
echo "1-4"
esac
done
--------------------------------------------------------------------------------------------
示例3:使用awk获取
case $options in
1)
memory_monitor(){
total=`free -m |grep Mem |awk '{print $2}'`
used=`free -m |grep Mem |awk '{print $3}'`
use_rate=`echo "scale=2;$used/$total" |bc`
result=`echo "$use_rate>0.8" |bc`
if(( $result == 1 ))
then
echo "内存使用率大于80%!!!"
else
echo "内存使用状态良好!"
fi
}
memory_monitor
;;
|
二. user group 用户与组
2.1 常见命令
id 查看
useradd 创建
userdel 删除
passwd 创建用户密码
su 切换用户
usermod 更改用户信息
2.2 为什么要引入这个用户和组?
1、安全性
2、权限管理
3、资源管控
对文件的访问,读写可以管控
对进程的管理 --> 谁可以管理
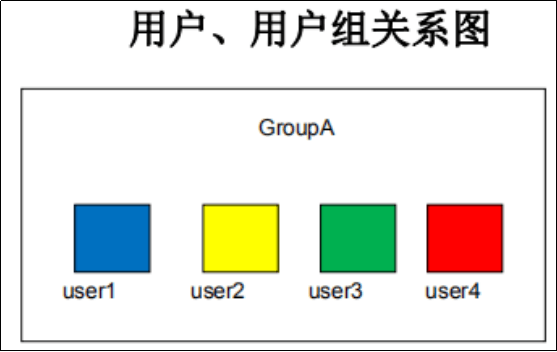
2.3 用户和组
每个用户有一个唯一的UID
每个组也有一个唯一的GID
一个用户可以属于不同组
一个组可以有不同用户 # 注:多对多的关系
用户和组 --> 权限资源管控
用户加入组,就可以有这个组的权限
默认情况下,创建用户,会添加一个和用户同名的组
1
2
3
4
5
6
7
8
9
10
11
12
13
14
15
16
17
18
19
20
21
22
23
24
25
26
27
28
29
30
31
32
33
34
35
36
37
38
39
40
41
42
43
44
45
46
47
48
49
50
51
52
53
54
55
56
57
58
59
60
61
62
63
64
65
66
67
68
69
70
71
| [root@sanchuang-linux ~]# id chenpeng
uid=1030(chenpeng) gid=1030(chenpeng) 组=1030(chenpeng)
--------------------------------------------------------------------------------------------
[root@localhost ~]# useradd sanchuang
[root@localhost ~]# id sanchuang
uid=1000(sanchuang) gid=1000(sanchuang) 组=1000(sanchuang)
[root@localhost ~]# less /etc/passwd
[root@localhost ~]# less /home/sanchuang/
[root@localhost ~]# passwd sanchuang
更改用户 sanchuang 的密码 。
新的 密码:
无效的密码: 密码少于 8 个字符
重新输入新的 密码:
passwd:所有的身份验证令牌已经成功更新。
[sanchuang@localhost ~]$
[root@localhost ~]# less /etc/shadow
[root@localhost ~]# less /etc/shadow
shadow shadow-
[root@localhost ~]# less /etc/passwd
passwd passwd-
[root@localhost ~]# diff /etc/passwd /etc/passwd-
21d20
< sanchuang:x:1000:1000::/home/sanchuang:/bin/bash
[root@localhost ~]# diff /etc/shadow /etc/shadow-
21d20
< sanchuang:$6$dKQsah/D$6sm6owwvDEnVs8BclDWQZ7meYSaMf5Y7AofxzxwxO0PPrvzqHHVCer1G656iY2gE.sUOarUl9beKi2usYdATQ1:18571:0:99999:7:::
[root@localhost ~]# less /etc/group
[root@localhost ~]# less /etc/gshadow
[root@localhost ~]# cd /home/sanchuang/
[root@localhost sanchuang]# ls
[root@localhost sanchuang]# ls -al
总用量 12
drwx------. 2 sanchuang sanchuang 62 11月 5 10:25 .
drwxr-xr-x. 3 root root 23 11月 5 10:25 ..
-rw-r--r--. 1 sanchuang sanchuang 18 4月 1 2020 .bash_logout
-rw-r--r--. 1 sanchuang sanchuang 193 4月 1 2020 .bash_profile
-rw-r--r--. 1 sanchuang sanchuang 231 4月 1 2020 .bashrc
[root@localhost sanchuang]# cd /etc/skel/
[root@localhost skel]# ls -al
总用量 24
drwxr-xr-x. 2 root root 62 10月 6 16:33 .
drwxr-xr-x. 77 root root 8192 11月 5 10:27 ..
-rw-r--r--. 1 root root 18 4月 1 2020 .bash_logout
-rw-r--r--. 1 root root 193 4月 1 2020 .bash_profile
-rw-r--r--. 1 root root 231 4月 1 2020 .bashrc
[root@localhost skel]# less /etc/login.defs
UID_MIN 1000
UID_MAX 60000
SYS_UID_MIN 201
SYS_UID_MAX 999
CREATE_HOME yes
ENCRYPT_METHOD SHA512
[root@localhost skel]# ls /etc/group
group group-
[root@localhost skel]# ls /etc/gshadow
gshadow gshadow-
[root@localhost spool]# cd /var/spool/mail/
[root@localhost mail]# ls
sanchuang
[sanchuang@localhost ~]$ less /etc/shadow
/etc/shadow: 权限不够
|
2.4 用户创建牵扯到哪些文件
账户信息相关文件
组相关文件
用户环境默认设置
用户的家目录
用户默认属性设置文件
邮件目录
2.5 /etc/passwd 文件详解
1
2
3
4
5
6
7
8
9
10
11
12
| [root@localhost mail]# cat /etc/passwd
root:x:0:0:root:/root:/bin/bash
bin:x:1:1:bin:/bin:/sbin/nologin
sanchuang:x:1000:1000::/home/sanchuang:/bin/bash
·使用:分隔
·字段1:用户名
·字段2:密码占位符,通常为“x”或者“*”(因为这个文件谁都可读,所以真正的密码存放在/etc/shadow)
·字段3:用户id
·字段4:用户所属基本组id
·字段5:用户描述信息
·字段6:家目录
·字段7:登录shell的信息
|
1
2
3
4
5
6
7
8
| 示例
--------------------------------------------------------------------------------------------
[root@localhost ~]# ls -ld /etc/shadow
----------. 1 root root 2330 11月 5 20:51 /etc/shadow
[root@localhost ~]# ls -ld /etc/passwd
-rw-r--r--. 1 root root 2006 11月 5 20:51 /etc/passwd
|
2.6 练习:找出系统中uid大于1000的用户,显示出它的名字,UID,家目录,shell
找出系统中uid大于1000的用户,显示出它的名字,UID,家目录,shell
1
2
3
4
5
| [root@sanchuang-linux ~]# awk -F: '$3>1000{print $1,$3,$6,$7}' /etc/passwd
chenpeng 1030 /home/chenpeng /bin/bash
|
2.7 练习:找出/etc/passwd中有几种shell信息
找出/etc/passwd中有几种shell信息
2.8 useradd详解
1
2
3
4
5
6
7
| Shell设置
[root@sanchuang-linux ~]# awk -F: '{print $7}' /etc/passwd |sort|uniq
/bin/bash
/bin/sync
/sbin/halt
/sbin/nologin
/sbin/shutdown
|
1
2
3
4
5
6
7
8
9
| --------------------------------------------------------------------------------------------
[root@localhost ~]# sync
--------------------------------------------------------------------------------------------
[root@localhost ~]# which sync
/usr/bin/sync
敲sync会按照PATH变量的路径下向下找下去
执行一个/bin/bash 就会到我们现在的终端环境了
|
三. 用户和组的关系
每个账户有一个唯一的UID
每个组也有一个唯一的GID
多个账户可以属于同一个组
四. 用户和组的相关文件
和账户相关文件
和组相关文件
账户宿主目录中文件来源
默认账户的属性文件
用于保存用户的帐号基本信息
文件位置:/etc/passwd
每一行对应一个用户的帐号记录
字段1:用户帐号的名称
字段2:用户密码字串或者密码占位符“x”
字段3:用户帐号的UID号
字段4:所属基本组帐号的GID号
字段5:用户描述信息
字段6:家目录
字段7:登录Shell信息
五. 用户和组的相关文件
用户账户:
UID (User Identity,用户标识号)
超级用户root的UID为0
程序用户的UID1-999
普通用户的UID大于等于1000
六. 添加与删除用户
useradd命令
常用命令选项
-u:指定 UID 标记号
-d:指定宿主目录,缺省为 /home/用户名
-e:指定帐号失效时间
-g:指定用户的基本组名(或GID号)
-G:指定用户的附加组名(或GID号)
-M:不为用户建立并初始化宿主目录
-s:指定用户的登录Shell
-c:用户注释描述信息
-r: 新建系统用户,不会有新建家目录
#注:每次新建用户,uid都会在上一个用户uid基础上+1
#注:默认新建用户从1001开始
Shell设置
1
2
3
4
5
| /bin/bash
/bin/sync
/sbin/halt
/sbin/nologin
/sbin/shutdown
|
1
2
3
4
5
6
7
8
9
10
11
12
13
14
15
16
17
18
19
20
21
| 示例:-s /sbin/nologin
--------------------------------------------------------------------------------------------
[root@localhost mail]# useradd -s /sbin/nologin sanchuang2
[root@localhost mail]# echo 123456|passwd sanchuang2 --stdin
更改用户 sanchuang2 的密码 。
passwd:所有的身份验证令牌已经成功更新。
[root@localhost mail]# ssh sanchuang2@192.168.136.136
……………………………………
Are you sure you want to continue connecting (yes/no)? yes
Warning: Permanently added '192.168.136.136' (ECDSA) to the list of known hosts.
sanchuang2@192.168.136.136's password:
This account is currently not available. # 注:提示用户不可达,因为sanchuang2的Shell是nologin,不能直接登录
Connection to 192.168.136.136 closed.
[root@localhost ~]# su - sanchuang2 # 注:不能切换
上一次登录:四 11月 5 11:49:14 CST 2020从 192.168.136.136pts/2 上
This account is currently not available.
--------------------------------------------------------------------------------------------
[root@localhost ~]# usermod -s /bin/bash sanchuang2 # 注:usermod -s 更改用户的shell信息
[root@localhost ~]# cat /etc/passwd|grep sanchuang2
sanchuang2:x:1001:1001::/home/sanchuang2:/bin/bash
|
练习:显示出系统中uid大于1000并且用户名包含sanchuang的用户信息(用户名,用户Id,用户家目录)
显示出系统中uid大于1000并且用户名包含sanchuang的用户信息(用户名,用户Id,用户家目录)
1
2
3
4
5
6
7
8
| [root@localhost ~]# awk -F: '$3>1000{print $1,$3,$6}' /etc/passwd
sanchuang2 1001 /home/sanchuang2
方法1
[root@localhost ~]# awk -F: '$3>1000{print $1,$3,$6}' /etc/passwd |grep sanchuang
sanchuang2 1001 /home/sanchuang2
方法2
[root@localhost ~]# awk -F: '$3>1000 && $1 ~ /sanchuang/{print $1,$3,$6}' /etc/passwd
sanchuang2 1001 /home/sanchuang2
|
七. 进程
进程:正在运行中的程序
程序:代码集合,放在磁盘上的
进程是计算机进行资源分配的基本单位
进程的组成核心:进程控制块(PCB)
PCB一般包括
1、pid 进程唯一标识符
2、有效用户信息 -euid,egid(通常情况下就是uid,gid) # 注:就是进程属于哪个用户
3、程序的状态
4、程序的优先级
5、程序的上下文
八. Python中使用os模块查看当前进程的用户信息
Python中使用os模块查看当前进程的用户信息
1
2
3
4
5
6
7
8
9
10
11
12
13
14
15
| >>> import os
>>> os.geteuid()
0
>>> os.getuid()
0
--------------------------------------------------------------------------------------------
普通用户导入 os模块
[sanchuang2@localhost ~]$ python3
>>> import os
>>> os.geteuid()
1001
>>> os.getuid()
1001
[sanchuang2@localhost ~]$ id sanchuang2
uid=1001(sanchuang2) gid=1001(sanchuang2) 组=1001(sanchuang2)
|
九. ftp协议(文件传输协议)
9.1
vsftpd服务与本地用户
ftp的服务 做文件传输的,上传或下载一个文件到指定的地方
ftp是一个文件传输服务,主要用于上传和下载文件,实现文件共享
匿名用户和本地用户都可以登录ftp服务,它们登录进去之后只能操作家目录下的文件或者文件夹
三种用户:
1、匿名用户
2、本地用户 # 注:ftp传输可以使用linux本地用户;ssh登录也可以用本地用户
3、虚拟用户
1
2
3
4
5
6
7
8
9
10
11
12
13
14
15
16
17
18
19
20
21
22
23
24
25
26
27
28
29
30
31
32
33
34
35
36
37
38
39
40
41
42
43
44
45
46
47
48
49
50
51
52
53
54
55
56
57
58
59
60
61
62
63
64
65
66
67
68
69
70
71
72
73
74
75
76
77
78
79
80
81
82
83
84
85
86
87
88
| ============================================================================================
1、服务安装
[root@sanchuang-linux ~]# yum install vsftpd
--------------------------------------------------------------------------------------------
2、启动服务
[root@sanchuang-linux ~]# service vsftpd restart
Redirecting to /bin/systemctl restart vsftpd.service
[root@sanchuang-linux ~]# ps -ef |grep vsftp
root 3377 1 0 14:51 ? 00:00:00 /usr/sbin/vsftpd /etc/vsftpd/vsftpd.conf
root 3379 3184 0 14:52 pts/1 00:00:00 grep --color=auto vsftp
--------------------------------------------------------------------------------------------
3、安装客户端
使用匿名用户(ftp)登录的话,修改/etc/vsftpd/vsftpd.conf里的配置 anonymous_enable=YES
登录上去之后,默认读取系统中ftp这个用户的家目录文件
-----------------------------------------------------
[root@sanchuang-linux ~]# yum install lftp -y
[root@sanchuang-linux ~]# yum install ftp -y
============================================================================================
[root@sanchuang-linux ~]# lftp ftp@192.168.0.27
密码:
[root@localhost ~]# ftp 192.168.136.136
………………………………
Name (192.168.136.136:root): ftp
331 Please specify the password.
Password:
230 Login successful.
………………………………
ftp>
============================================================================================
[root@sanchuang-linux ~]# cat /etc/passwd
ftp:x:14:50:FTP User:/var/ftp:/sbin/nologin
============================================================================================
[root@sanchuang-linux ~]# vim /etc/vsftpd/vsftpd.conf
anonymous_enable=YES
============================================================================================
登录上去之后,默认读取系统中ftp这个用户的家目录文件
/var/ftp
-----------------------------------------------------
[root@localhost ~]# cd /var/ftp/
[root@localhost ftp]# ls
pub
[root@localhost ftp]# cd pub
[root@localhost pub]# ls
[root@localhost pub]# touch aa bb
--------------------------------------------------------------------------------------------
ftp> ls
…………………………
drwxr-xr-x 2 0 0 26 Nov 05 07:20 pub
ftp> cd pub
…………………………
ftp> ls
…………………………
-rw-r--r-- 1 0 0 0 Nov 05 07:20 aa
-rw-r--r-- 1 0 0 0 Nov 05 07:20 bb
226 Directory send OK.
--------------------------------------------------------------------------------------------
ftp> get aa
local: aa remote: aa
…………………………
ftp> !ls
aa addstr.py
ftp> !pwd
/root
============================================================================================
[root@localhost ~]# ftp 192.168.136.136
Name (192.168.136.136:root): sanchuang
Password:
230 Login successful.
--------------------------------------------------------------------------------------------
ftp> put first.py
local: first.py remote: first.py
…………………………
1097 bytes sent in 0.0157 secs (69.83 Kbytes/sec)
ftp> ls
…………………………
-rw-r--r-- 1 1000 1000 1097 Nov 05 07:34 first.py
226 Directory send OK.
============================================================================================
[root@localhost pub]# less /etc/services
ftp 21/tcp
ftp 21/udp fsp fspd
|
9.2 匿名用户和本地用户都可以登录ftp服务,它们登录进去之后只能操作家目录下的文件或者文件夹
匿名用户和本地用户都可以登录ftp服务,它们登录进去之后只能操作家目录下的文件或者文件夹
三种用户:
1、匿名用户 # 注:匿名用户 ftp ; 无需密码 ; 家目录 /var/ftp ; ftp也是系统的本地用户,系统自动创建ftp用户,nologin,可以通过ftp登录
2、本地用户 # 注:就是linux系统上的用户 ; ftp登录之后在本地用户家目录下
3、虚拟用户 # 注:建立出一个虚拟的用户,映射到本地用户
#注:/etc/passwd 第6个字段 是用户的家目录
#注:看用户的家目录 看/etc/passwd文件
9.3 ftp常用命令
ftp常用命令
ftp常用命令:
上传文件:put # 注:匿名用户不能上传
下载文件:get
查看:ls
切换路径:cd
9.4* ftp的2种工作模式
ftp的2种工作模式(面试)
问的时候:总结(要提到端口号)
主动模式和被动模式都会开启21号端口进行连接
区别是数据连接的方式
主动模式:服务器主动开启20号端口去和客户机主动建立数据连接,传输数据
被动模式:客户机拿到随机开放端口后向服务器进行一个数据传输,客户端向这个随机端口去建立连接,进行数据传输
一、主动模式(默认情况下是主动模式)
1、客户端登录时请求ftp服务器 命令连接端口(21号端口)
2、21号端口返回信息登录成功或者登录失败
3、登录成功后客户端请求传输数据(对21号端口发起一个请求),开启一个随机端口
4、服务器主动开启它的20号端口去把它的数据传递给客户端的随机端口
服务器主动开启20号端口,向客户机主动发送数据
二、被动模式
1、客户端登录时请求ftp服务器 开启 命令连接端口(21号端口)
#注:21号端口都是用来做命令连接的
2、21号端口返回信息登录成功或者登录失败
3、客户机请求数据传输(客户机向服务器请求数据传输时,向服务器发送一个pasv命令,告诉服务器端要以被动模式取接收命令。这时服务器端就开放一个端口,可以指定范围,返回给客户机,把这个端口号返回给客户端)
4、收到服务器开放端口号
5、开始连接服务器端口,进行数据传输(和5555号端口建立连接)
假设开放的是5555,服务器就会把5555端口起来,端口处于监听状态,别人就可以连接过来,就可以和这个主机建立连接,就可以通过5555号端口传递数据
#注:被动模式需要配置,默认主动模式
无论主动模式,还是被动模式,21号端口都必须起来
主动模式20号端口起来,被动模式20号端口不一定起来
#注:数据请求和命令请求不是同一个端口的

十. usermod userdel
usermod
usermod命令
格式:usermod [选项]... 用户名
常用命令选项
-l:更改用户帐号的登录名称
-L:锁定用户账户
-U:解锁用户账户
以下选项与useradd命令中的含义相同
-u、-d、-e、-g、-G、-s
userdel
userdel命令
1
2
3
4
5
6
7
8
| 示例
--------------------------------------------------------------------------------------------
[root@localhost ~]# useradd stu01
[root@localhost ~]# ls -ld /home/stu01/
drwx------ 2 stu01 stu01 4096 09-09 12:38 /home/stu01/
[root@localhost ~]# userdel -r stu01
[root@localhost ~]# ls -ld /home/stu01/
ls: /home/stu01/: 没有那个文件或目录
|
十一. useradd
useradd命令
常用命令选项
十二. 用户
12.1
用户账户:
超级用户root # 注:拥有最高权限
程序用户 # 注:程序运行过程中需要使用的用户
普通用户 # 注:手动创建的用户
UID (User Identity,用户标识号)
超级用户root的UID为0
程序用户的UID 1-999
普通用户的UID大于等于1000
1
2
3
4
5
6
7
8
9
10
11
12
13
14
15
16
17
18
19
20
21
22
23
24
25
26
27
28
29
30
31
32
33
34
35
36
37
38
39
40
41
| 示例:mysql uid
--------------------------------------------------------------------------------------------
[root@localhost ~]# id mysql
uid=1000(mysql) gid=1000(mysql) 组=1000(mysql)
[root@localhost ~]# id sanchuang2
uid=1001(sanchuang2) gid=1001(sanchuang2) 组=1001(sanchuang2)
示例
--------------------------------------------------------------------------------------------
[root@localhost ~]# useradd -u 1100 chenpeng1
[root@localhost ~]# id chenpeng1
uid=1100(chenpeng1) gid=1100(chenpeng1) 组=1100(chenpeng1)
[root@localhost ~]# useradd -u 1101 -g 1100 chenpeng2
[root@localhost ~]# id chenpeng2
uid=1101(chenpeng2) gid=1100(chenpeng1) 组=1100(chenpeng1)
示例
--------------------------------------------------------------------------------------------
[root@localhost ~]# usermod -u 1200 chenpeng2
[root@localhost ~]# id chenpeng2
uid=1200(chenpeng2) gid=1100(chenpeng1) 组=1100(chenpeng1)
示例
--------------------------------------------------------------------------------------------
[root@localhost ~]# useradd -d /var/log/sanchuang6 sanchuang6
[root@localhost ~]# cd /var/log/sanchuang6/
[root@localhost sanchuang6]# ls
[root@localhost sanchuang6]# less /etc/passwd
sanchuang6:x:1201:1201::/var/log/sanchuang6:/bin/bash
示例:指定附加组
--------------------------------------------------------------------------------------------
[root@localhost sanchuang6]# useradd -g chenpeng1 -G sanchuang,sanchuang2 sanchuang7
[root@localhost sanchuang6]# id sanchuang7
uid=1202(sanchuang7) gid=1100(chenpeng1) 组=1100(chenpeng1),1000(sanchuang),1001(sanchuang2)
============================================================================================
·-c:用户注释描述信息
/etc/passwd 第5列可以查看描述信息
|
12.2 userdel 删除用户
userdel命令
格式:userdel [-r] 用户名
添加 -r 选项时,表示连用户的宿主目录一并删除
1
2
3
4
5
6
7
8
9
10
11
12
13
14
15
16
| 示例1
--------------------------------------------------------------------------------------------
[root@localhost ~]# useradd stu01
[root@localhost ~]# ls -ld /home/stu01/
drwx------ 2 stu01 stu01 4096 09-09 12:38 /home/stu01/
[root@localhost ~]# userdel -r stu01
[root@localhost ~]# ls -ld /home/stu01/
ls: /home/stu01/: 没有那个文件或目录
示例2
--------------------------------------------------------------------------------------------
[root@localhost sanchuang6]# userdel sanchuang7
[root@localhost sanchuang6]# less /etc/passwd
[root@localhost sanchuang6]# cd /home/sanchuang7
[root@localhost sanchuang7]# ls /var/spool/mail/sanchuang7
/var/spool/mail/sanchuang7
|
十三. usermod 用户修改
usermod命令
格式:usermod [选项]... 用户名
常用命令选项
1
2
3
4
5
6
7
8
9
10
11
12
13
14
15
16
17
18
19
20
21
| 示例:-L:锁定用户账户
--------------------------------------------------------------------------------------------
[root@localhost sanchuang7]# id sanchuang6
uid=1201(sanchuang6) gid=1201(sanchuang6) 组=1201(sanchuang6)
[root@localhost sanchuang7]# usermod -L sanchuang6
[root@localhost sanchuang7]# less /etc/shadow
chenpeng2:!$6$P3yFUy.H$UOfUIbl8V3h1ng4J/OdVV1aWc3Cx3s5bldkysl33aDyrigsgK0VQ3nzrC4mojDNotpE9w61NbVQmZFqDDRfpl.:18571:0:99999:7:::
[root@localhost sanchuang7]# diff /etc/shadow /etc/shadow-
25c25
< chenpeng2:!$6$P3yFUy.H$UOfUIbl8V3h1ng4J/OdVV1aWc3Cx3s5bldkysl33aDyrigsgK0VQ3nzrC4mojDNotpE9w61NbVQmZFqDDRfpl.:18571:0:99999:7:::
---
> chenpeng2:$6$P3yFUy.H$UOfUIbl8V3h1ng4J/OdVV1aWc3Cx3s5bldkysl33aDyrigsgK0VQ3nzrC4mojDNotpE9w61NbVQmZFqDDRfpl.:18571:0:99999:7:::
--------------------------------------------------------------------------------------------
[root@localhost ~]# ssh chenpeng2@192.168.0.188
chenpeng2@192.168.0.188's password: # 注:锁上之后不能密码登录
Permission denied, please try again.
…………………………
Permission denied (publickey,gssapi-keyex,gssapi-with-mic,password).
|
十四. /etc/shadow
用于保存密码字串、密码有效期等信息
十五. passwd
passwd命令
常用命令选项
root用户可以修改所有用户密码,不要求复杂性
普通用户只能改自己的密码,要求复杂性
1
2
3
4
5
6
7
8
9
10
11
12
13
14
15
16
17
18
19
20
21
22
23
24
25
26
27
28
29
30
31
32
33
34
35
36
37
38
39
40
41
42
43
| 示例
--------------------------------------------------------------------------------------------
[root@localhost sanchuang7]# passwd -d sanchuang6
清除用户的密码 sanchuang6。
passwd: 操作成功
[root@localhost sanchuang7]# useradd sanchuang5
[root@localhost mail]# less /etc/shadow
sanchuang6::18571:0:99999:7:::
sanchuang5:!!:18571:0:99999:7:::
示例:usermod -L 和 passwd -l 锁定用户
--------------------------------------------------------------------------------------------
[root@localhost mail]# useradd chen001
[root@localhost mail]# useradd chen002
[root@localhost mail]# useradd chen003
[root@localhost mail]# echo 123456|passwd chen001 --stdin
[root@localhost mail]# echo 123456|passwd chen002 --stdin
[root@localhost mail]# echo 123456|passwd chen003 --stdin
[root@localhost mail]# usermod -L chen002
[root@localhost mail]# passwd -d chen003
清除用户的密码 chen003。
passwd: 操作成功
[root@localhost mail]# less /etc/shadow
chen001:$6$y……k1q.yk8U1gOGp/:18571:0:99999:7:::
chen002:!$6$u……YF0.:18571:0:99999:7:::
chen003::18571:0:99999:7:::
-------------------------------------------------------------------------
[root@localhost ~]# ssh chen003@192.168.136.136
chen003@192.168.136.136's password:
…………
Permission denied (publickey,gssapi-keyex,gssapi-with-mic,password).
[root@localhost ~]# ssh chen002@192.168.136.136 # 注:登录不上去
chen002@192.168.136.136's password:
…………
Permission denied (publickey,gssapi-keyex,gssapi-with-mic,password).
[root@localhost ~]# ssh chen001@192.168.136.136
chen001@192.168.136.136's password:
[chen001@localhost ~]$
|
十六. /etc/group
/etc/group
字段一:组名
字段二:密码字段
字段三:组id
字段四:存放是当前组为附属组时,有哪些用户
1
2
3
4
| 示例
--------------------------------------------------------------------------------------------
[root@localhost ~]# less /etc/group
tech:x:200:b1,b2,a1,a2
|